Can You Dye Clip-In Hair Extensions?
- Irene GilmanAre your go-to clip-in hair extensions showing signs that they've seen better days? Maybe the shade just isn't as vibrant as it used to be or you've switched up your own hair color. No stress. We've got the lowdown on how you can get those extensions popping with color again—because why not have your hair looking as good as you feel?

In this guide, we'll explore clip in hair extensions you can dye and walk you through the entire process of coloring your extensions safely and effectively. We'll cover everything from selecting the right type of extensions and choosing the best dye, to a detailed step-by-step tutorial on how to dye clip in hair extensions at home. Plus, we'll share essential tips for maintaining your extensions' vibrancy and health post-dyeing. Whether you're looking to enhance your extensions with a subtle change or a bold new color, you'll find all the information you need right here.
Types of Hair Extensions Suitable for Dyeing
Can hair extensions be dyed? For starters, what are your clip-ins made of – Choosing the right type of hair extensions for dyeing is crucial for achieving great results without damaging the hair. Not all hair extensions are created equal, and the material they are made of can significantly impact how well they can be dyed.
-
100% Human Hair Extensions: These are the best choice for dyeing because they respond to hair dye just like natural hair. Human hair clip in extensions can handle both dyeing and bleaching, allowing for a wide range of color changes—from subtle shifts to complete transformations. Atelier offers premium human hair extensions that are ideal for those looking to customize their look.
- Synthetic Hair Extensions: These are generally not recommended for dyeing because synthetic fibers do not react to hair dye the same way human hair does. Attempting to dye synthetic extensions often results in uneven coloring and can damage the fibers.
@b3v3r463 At least the clips are pink now 🫶
♬ Spider-Man 2099 (Miguel O'Hara) - Spider-Man: Across the Spider-Verse - Daniel Pemberton
Different Methods for Dyeing Hair Extensions
When it comes to dyeing clip-in hair extensions, there are several methods you can choose from, each with its own benefits:
Direct Dye

This method involves applying the dye directly onto the hair extensions. It's great for achieving vibrant, intense colors and allows for precise application, ensuring that you get the exact shade you want.
Water Bath Dip Method

This gentler approach involves diluting the dye in a bath of warm water and then dipping the extensions into the solution. It’s ideal for achieving a softer, more subtle color change and is excellent for maintaining the hair's integrity.
Choosing the Right Hair Dye for Your Clip-Ins

Selecting the right dye for your clip-ins is vital to achieve the desired color while maintaining the health of the hair. Can I dye my hair extensions, sure but here’s what to keep in mind:
-
Color Match: Consider whether you are aiming to enhance the natural color, match your current hair shade, or try something bold and new. Consulting with a professional colorist can also be beneficial to ensure the chosen shade complements your natural hair and meets your expectations.
- Type of Dye: Opt for semi-permanent or demi-permanent dyes. These types are gentler than permanent dyes and are less likely to compromise the hair’s integrity. They also provide ample color saturation for a noticeable change without the commitment of permanent color.
Tip for Dyeing Clip-In Hair Extensions Safely
Before you begin the dyeing process, always perform a strand test. This precaution ensures the dye does not damage the wefts or turn out to be an unexpected color.
Step-by-Step Guide: How to Dye Clip-In Hair Extensions
Dyeing your clip-ins at home can be a rewarding DIY project that refreshes and customizes your look. Here’s how to dye clip in extensions step by step:
Step 1: Prepare Your Materials

Gather all the necessary materials before you begin. You'll need:
- Hair dye and developer (if required)
- Mixing bowl and dye brush
- Gloves to protect your hands
- Aluminum foil or plastic wrap
- Old towels or sheets to protect surfaces
- A wide-tooth comb
Step 2: Prepare the Extensions

Make sure your extensions are clean and free from any styling products. Wash them with a sulfate-free shampoo and let them air dry completely before dyeing.
Step 3: Mix the Dye

Follow the instructions on the dye package to mix the dye with the developer. Ensure it’s well combined to avoid uneven color.
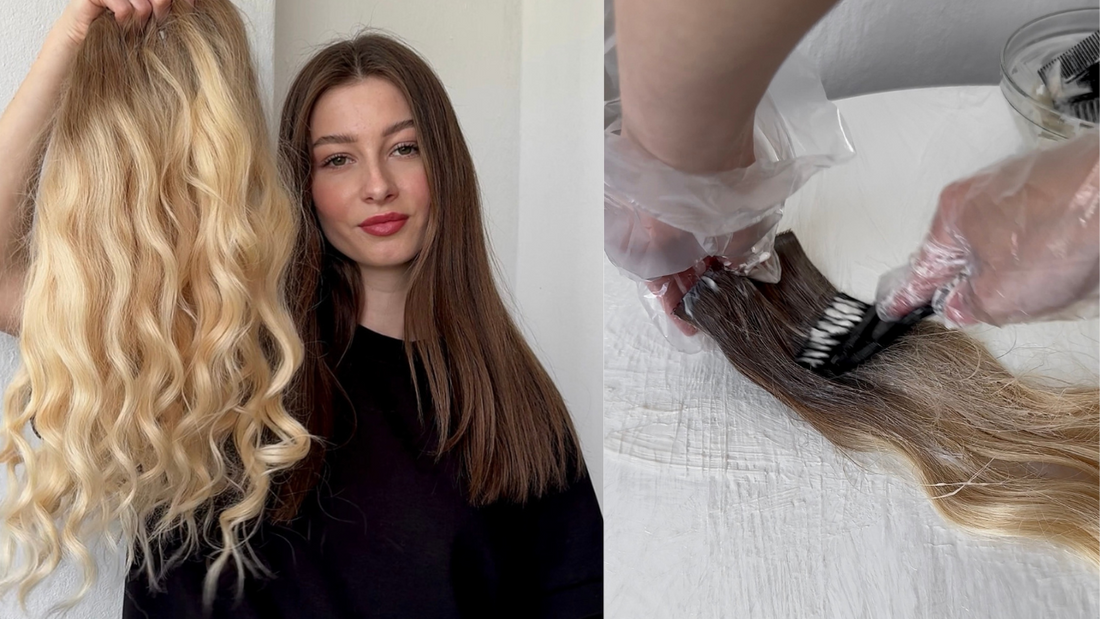
Step 4: Apply the Dye
Lay the weft flat on the covered work surface. Apply the dye evenly using the brush, starting from the top and working your way down to the ends. Ensure every strand is covered to get an even result.
Step 5: Wait for the Color to Set

Wrap the dyed extensions in aluminum foil or plastic wrap and let them sit for the amount of time specified by the dye instructions. This time can vary depending on the brand and type of dye you use.
Step 6: Rinse the Extensions and Condition

Once the processing time is up, rinse the weft in lukewarm water until the water runs clear. It’s important not to use hot water as it can affect the dye's adherence to the hair. After rinsing, apply a generous amount of sulfate-free conditioner to the extensions. This step is crucial as it helps seal the color in and restores moisture after the chemical treatment.
Step 8: Dry the Extensions
Gently pat the extensions dry with a towel and lay them flat on a dry towel to air dry. Avoid using a blow dryer as excessive heat can damage the newly dyed hair.
Watch Here:
Maintenance and Care After Dyeing
To keep your dyed clip-ins vibrant and healthy, it's essential to use sulfate-free and color-safe shampoos and conditioners that avoid stripping color and moisture. Limit heat styling making sure to always use a heat protectant to reduce the risk of damage. Regular deep conditioning treatments will nourish and maintain the hair's shine and softness. Proper storage is also key; ensure the extensions are dry and store them flat or hang them in a cool, dry place to avoid tangles. If swimming, protect your hair from chlorine and saltwater by rinsing it immediately afterwards or wearing a cap. Regular, gentle detangling from ends to roots with a soft-bristle brush or wide-tooth comb will help keep your extensions smooth and manageable.
Final Thoughts
Refreshing your clip-in hair extensions with a new color is a great way to match them to your current hair or to simply bring some freshness to them. With the right tools and techniques, dyeing your Atelier Extensions at home can be straightforward and easy. Can you color your clip in hair extensions? Absolutely! The key lies in selecting the correct dye, applying it carefully, and maintaining your extensions with the proper care post-dyeing. By following the steps outlined in this guide, you can ensure that your extensions continue to look their best and enhance your hair.
Other Related Posts

Does your hair care routine feel like it’s missing something? While we spend so much time caring for our strands, we often forget the foundation of it all: the scalp. From seasonal dryness and pesky flakes to itchiness or even early signs of thinning, scalp health can feel like a...

Hair extensions are an investment in your beauty routine, and when they begin to lose their soft, silky texture, it can feel disheartening. Whether it’s a lack of luster, frizz, or tangling, you might be left wondering how to restore them to their original beauty. We understand the frustrations—especially when...

We’ve all been there—dreaming of longer, fuller hair, but not quite sure where to start. With so many hair extension options available, it’s easy to feel lost in the choices. The last thing you want is to pick the wrong type of extensions and risk damaging your natural hair. The...

Your hair extensions deserve the same level of care and attention as your natural hair—after all, they give you the long, luscious style you love. To keep them looking fresh, shiny, and tangle-free for as long as possible, regular deep-cleaning is essential. Here’s everything you need to know about how...

Let’s be real—hair extensions can transform your look, but picking the right set for your lifestyle can be a little overwhelming. Should you go for long, voluminous clip-ins for a night out, or are you after something more permanent and low-maintenance? Whether you’re a busy professional, an active gym-goer, or...
F.A.Q's
Yes, you can dye clip-in hair extensions at home, but it's important to ensure they are made of 100% human hair. Synthetic extensions cannot be dyed with regular hair dye. Use a semi-permanent or demi-permanent hair color for the best results and always do a strand test to ensure the color matches.
To dye clip-in hair extensions safely, lay them flat on a surface, and apply the dye evenly, ensuring full coverage. Avoid dyeing the clips or the wefts, as this can damage them. After applying the dye, let it sit for the recommended time, then rinse with cool water and deep condition to maintain the hair's softness.
It's not recommended to lighten clip-in hair extensions, as bleaching can severely damage the hair, causing dryness and breakage. Most extensions have already been processed, and lightening them further can compromise their quality. Instead, opt for dyeing the extensions a darker shade.
To match the color of dyed clip-in extensions with your natural hair, choose a dye that is either the same shade or slightly darker than your own hair. Start by dyeing a small section of the extensions to test the color. If you're unsure, bring your extensions to a professional colorist to achieve the perfect match.
No, synthetic clip-in hair extensions cannot be dyed with traditional hair dye. Synthetic fibers do not absorb color in the same way as human hair. If you want a new color for synthetic extensions, it's better to purchase them in the desired shade or use specialized fabric dyes made for synthetic materials.